

Old walls can change how a room feels every day. A small stain or dull color can make a space look tired. Many homeowners search for the interior painting process when they want a fresh and clean home look. A simple plan can turn faded walls into smooth, bright surfaces with better comfort and style in daily living spaces.
Understanding the workflow makes painting less confusing for beginners. The interior painting process starts with a wall check and simple preparation before color is applied. One homeowner noticed uneven patches in a living room and followed the room painting steps for correction. This guide shows how house painting steps work in real homes using clear planning tools and careful application for lasting results.
Understanding the Interior Painting Process From Start

Interior painting improves how a home feels and looks. Many people start when the walls show stains, fading, or small cracks. Now let’s see why planning matters in the interior painting process, explained so results stay smooth and long-lasting in real living spaces with daily use and lighting changes. Some homeowners also rely on interior painting services to ensure proper preparation, clean application, and professional finishing across all rooms.
A clear home painting process helps avoid a patchy finish and uneven color. One family noticed dull walls in their living room after years of use. They followed the interior painting guide and prepared the surface first. This simple approach made the walls look fresh, clean, and balanced across the entire room.
Key Reasons Homes Need Interior Wall Painting Work
Walls slowly lose their fresh look due to daily use and the environment. Now, let’s see why regular painting is important for maintaining beauty and comfort in real home spaces with simple house painting steps.
- Surface fading over time
Sunlight and indoor lighting reduce wall brightness. Colors start looking dull and uneven. This is a common reason homeowners begin the interior painting process: to restore a clean and fresh room appearance. - Stains and daily marks
Food splashes, hand marks, and dust build up on walls. These marks become hard to remove with cleaning. The wall painting process helps cover stains and gives a smooth, clean surface again. - Cracks and small wall damage
Hairline cracks appear due to building movement or humidity. These cracks affect the overall look of the rooms. Proper house painting steps include filling and smoothing before applying paint. - Emotional and visual improvement
Fresh paint makes rooms feel brighter and more comfortable. A dull living room can feel new again after repainting. Many homeowners notice a better mood and energy after updating interior walls. - Increase in home value
Clean painted walls improve property appeal for buyers. A well-maintained interior painting process can make spaces look newer and more cared for during resale or rental viewings.
Preparing Walls Before Starting an Interior Paint Job
Wall preparation is the most important part of a good paint job. Many people skip it and face uneven color later. Now let’s see how proper prep in the wall painting process improves the final finish in real homes with simple and clear steps before any color is applied on the walls.
Good results start with cleaning, filling, and leveling walls. Dust, grease, and old marks must be removed before paintwork. One home had patchy paint because the walls were not cleaned well. Following the room painting steps with proper prep made the surface smooth and improved the final look across the entire space.
Cleaning And Dust Removal Techniques For Walls
Walls must be cleaned using a dry cloth and a mild soap solution to remove dust and stains. In one room, cooking smoke left a sticky layer on the walls. After proper cleaning as part of the interior painting guide, paint bonded better and gave a clean, even finish without patch marks or dull areas.
Crack Filling And Surface Smoothing Methods
Small cracks are filled using wall filler and then sanded smooth. One home had visible hairline cracks near windows. After repair and leveling as part of the wall painting process, the surface became even. This helped paint spread properly and avoided rough lines or uneven texture after drying.
Essential Tools Used In Professional Room Painting
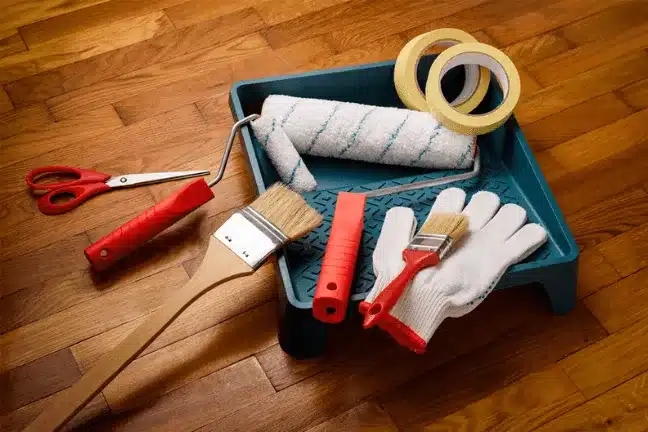
Good painting depends on the right tools and simple steps. Now let’s see how each tool supports room painting steps and improves finish quality in real homes using a proper home painting process for smooth and clean wall results. For exterior areas, similar quality tools and methods are also used in exterior painting services to maintain durability and surface protection under harsh conditions.
Paint Brushes And Their Use
Brushes are used for corners, edges, and small areas. They help control paint flow in tight spaces like window frames. In one room, the corners looked uneven when the roller was used alone. After using brushes, the interior painting process became smoother, and the edges looked clean and neat.
Paint Rollers For Large Walls
Rollers cover big wall areas quickly and evenly. They reduce streaks and give a smooth texture. One living room had patchy color when only brushes were used. After rollers were added as part of the room painting steps, the finish became even and faster to complete across large surfaces.
Paint Trays For Easy Loading
Trays hold paint and help load rollers evenly. They prevent dripping and waste. In one home, paint was applied unevenly due to overloading the brush. Using trays improved control and supported better flow during the home painting process, making work cleaner and more organized.
Masking Tape For Clean Edges
Masking tape protects corners, switches, and trims. It keeps lines sharp and prevents color spills. One kitchen wall had messy edges before use. After applying tape during the interior painting process, lines became sharp and professional-looking without extra touch-up work.
Protective Gear For Safety
Masks, gloves, and goggles protect from dust and fumes. They keep painters safe during work. One project caused eye irritation due to missing goggles. After proper safety measures, use the interior painting guide, follow safe steps, and reduce health risks during painting work.
Choosing Paint Types For Interior Home Wall Finishes
Paint type changes how a room looks and feels. It also affects cleaning and durability. Now lets see how different choices in the interior painting process help match color finish with real home needs for better daily use and long-lasting wall appearance. In specialized projects, custom cabinet painting is also used to match wall colors with furniture and create a balanced interior design style.
Matte Finish For Soft Wall Look
Matte paint gives a smooth and soft look with low shine. It hides small wall flaws very well. One bedroom with old patch marks looked cleaner after matte-finish use. In the wall painting process, it is often used in low-traffic rooms for a calm and simple appearance.
Satin Finish For Balanced Strength
A satin finish has a light shine and better durability. It is easier to clean than a mat. One living room used satin paint to handle dust and hand marks. This choice is common in interior painting guide plans for family spaces that need both style and easy care.
Gloss Finish For High Shine Protection
Gloss paint gives a strong shine and high durability. It is easy to wipe and clean. One kitchen wall used a gloss finish to handle oil splashes. During the interior painting process, it is often selected for areas that need strong protection and frequent cleaning.
Room-Wise Paint Selection Tips
Bedrooms work well with a matte finish for comfort. Living rooms suit satin for balance. Kitchens and bathrooms need gloss for cleaning. A simple wall painting process becomes easier when each room gets the right paint based on use and daily activity level.
Choosing Paint Types For Interior Home Wall Finishes
Paint choice changes how a room looks and how long walls stay fresh. Now let’s see how simple finish options in the interior painting process help match style with daily use in real homes.
Step 1: Matte Finish Selection
Matte paint gives a soft, non-shiny look that hides small wall flaws. It works well in bedrooms and quiet spaces. In one home, matte paint covered old patches in a study room. During the wall painting process, it helped create calm and smooth-looking walls without strong reflections.
Step 2: Satin Finish Selection
A satin finish adds a light shine and is easier to clean than matte. It works well in living rooms and family spaces. One home used satin paint to handle dust and hand marks. In the interior painting guide, it is often suggested for a balanced look and simple maintenance in busy areas.
Step 3: Gloss Finish Selection
Gloss paint gives a strong shine and high protection. It is best for kitchens and bathrooms. One kitchen wall used a gloss finish to handle oil stains and steam. In the wall painting process, it is chosen for areas that need frequent cleaning and strong surface protection.
Room-Wise Paint Planning Tips
Match paint type with room use for best results. Bedrooms suit matters for comfort and a soft look. Living rooms suit satin for easy cleaning. Kitchens and bathrooms need gloss for durability. A clear interior painting process becomes simple when each room gets the right finish based on daily use and activity.
Professional Room Painting Execution And Site Flow
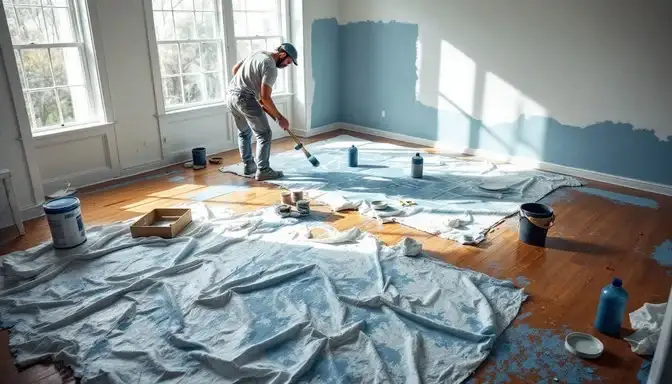
Professional painting follows a clear plan for smooth results. Now let’s see how room painting steps help teams manage setup work and finish quality in real homes using a structured approach that avoids delays and messy outcomes during the full painting process. Many companies offering interior painting services follow this structured workflow to maintain consistency and high-quality results in every project.
Good execution starts with proper planning and coordination. Experts follow the wall painting process steps to handle each area in order. One home had uneven timing between rooms before professionals managed the workflow. After structured work, each space was completed cleanly, and the full interior painting guide plan stayed on track.
Furniture Protection And Room Setup Process
Furniture is covered with sheets and moved away from the walls before painting starts. Floors are protected using plastic covers. In one living room, the sofa and table were safely wrapped to avoid stains. This step in the room painting steps keeps the space clean and allows smooth painting without damage or interruptions.
Final Walkthrough And Quality Assurance Check
After painting, experts inspect walls under light for any missed spots or uneven finish. One home had small roller marks that were fixed during the final check. This wall painting process step ensures smooth color balance and confirms that the interior painting guide standards are fully completed before project closure.
Drying And Curing Methods For Interior Painted Walls
Paint does not just dry fast; it also needs time to cure properly. Now lets see how different drying methods in the wall painting process help improve strength, color stability, and long-term finish in real home conditions with simple care steps.
Method 1: Natural Air-Drying Process
Natural air drying allows paint to settle slowly on walls. Good airflow helps remove moisture and speeds surface drying. One home kept windows open after painting and saw an even finish without marks. In the home painting process, this method is common for safe and smooth drying results.
Method 2: Layer-wise Drying Time Control
Each paint coat needs proper time before the next layer. The primer base and top coat all dry at different speeds. One room had patch marks because the next coat was applied early. Following the interior painting process correctly prevents peeling and gives a strong bond between layers for a long-lasting finish.
Method 3: Ventilation-Based Curing Support
Proper ventilation helps paint cure fully and become strong. Fans or open spaces improve air movement. One living room used fans after painting and reduced smell and moisture. In the wall painting process, this step ensures the paint hardens properly and resists damage from daily use over time.
Method 4 Post-Painting Care Routine
After painting, the walls should not be cleaned immediately. Light handling is needed for a few days. One family touched wet walls too early and left marks. Following the home painting process care rules keeps the surface smooth and helps paint reach full strength before regular cleaning starts.
Quality Inspection Steps After Interior Painting is Done
After the painting is finished, the walls must be checked with care. Now let’s see how experts review each detail in the interior painting guide to ensure smooth color and a clean finish in real home spaces with simple checks and final approval steps.
Step 1: Color Uniformity Check
Experts first check if all walls show even color without patches. Lighting from windows and bulbs is used for review. In one room, a slight shade difference was found near the corner. Following the house painting steps helped correct it before final approval for a smooth and balanced look.
Step 2: Surface Smoothness Inspection
Walls are checked for roller marks, bumps, or rough texture. One living room showed small, uneven spots after drying. During the room painting steps, sanding and correction fixed the issue. This step ensures a clean surface that feels smooth when touched and looks even from all angles.
Step 3: Touch-Up Correction Process
Small missed areas or thin paint spots are corrected using brushwork. One bedroom had light gaps near the edges. Experts fixed them carefully. In the interior painting guide, this step ensures complete coverage so no raw wall areas remain visible after finishing.
Step 4 Client Approval Stage
The homeowner reviews the final result under natural light. Any small changes are noted and corrected. One family requested a slight corner touch-up before approval. This final stage of house painting steps confirms satisfaction and ensures professional quality before closing the painting project.
Cost And Time Planning For Complete Home Painting Job
Planning the budget and time helps avoid stress during painting work. Now lets see how cost and schedule depend on simple factors in the home painting process and how smart planning improves results in real home projects with clear expectations. Homeowners sometimes compare results with long-term durability benefits seen in cabinet painting benefits, where quality work reduces future maintenance costs and extends surface life.
Step 1: Understanding Cost Factors
Painting cost depends on room size, paint type, and labor costs. Larger rooms need more paint and time. One home with high ceilings costs more due to extra work. In the interior painting process, premium paint also increases the budget but gives a longer-lasting and better finish.
Step 2: Labor And Material Planning
Skilled labor improves finish quality but adds service cost. Cheap labor may reduce quality. One family tried a low-cost option but needed repainting later. In the wall painting process, good materials and trained workers help avoid extra repair and save money in the long term.
Step 3: Budgeting Strategy For Homeowners
Set a budget before starting and divide the cost for paint tools and labor. Always keep an extra amount for small fixes. One homeowner planned a budget early and avoided delays. A clear home painting process becomes easier when costs are planned in a simple and realistic way.
Step 4: DIY Vs. Professional Cost Comparison
DIY painting saves money but needs time and effort. Mistakes can increase costs later. Professional work costs more but gives a smooth finish and durability. Many homeowners choose experts in the interior painting process for better quality and long-lasting wall results without repeated work.
Smart Takeaways For Better Home Painting Results
A good paint job is not only about color. It is about each step done in order. Now let’s see how the interior painting process explanation helps homeowners understand simple planning, cleaning, and coating for better wall results in real home spaces with Evers Painting.
Strong results always start with preparation and patience. Clean walls, sanding, and proper drying make a big difference in the final look. A clear home painting process also reduces mistakes like patchy color or peeling. One family followed basic steps and got smooth, bright walls that stayed fresh for years.
A simple interior painting guide helps you choose the right tools, paint type, and timing. It also avoids rushed work that leads to a poor finish. When each step is followed, the final result carefully looks clean, balanced, and professional, giving your home a fresh and comfortable feel.