

Faded paint can make even a well-kept home look tired. Peeling areas, stains, old colors, and worn trim can also reduce curb appeal. Exterior house painting gives your home a fresh look while helping protect outside surfaces. Still, choosing a paint color alone does not guarantee a good result. Proper planning matters just as much.
A good project starts with the condition of your home. You also need to consider colors, paint types, weather, surface preparation, and application. Cost and future care matter too. When these details work together, exterior home painting can look better and last longer. So, let’s start by checking what your home needs.
See What Your Home Exterior Needs Before Painting
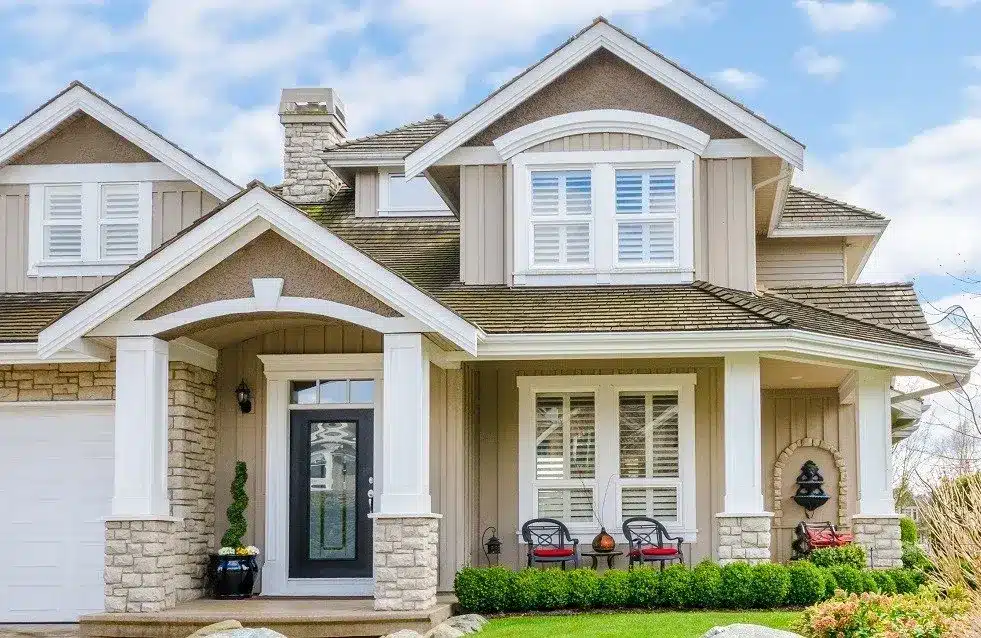
Before choosing paint, take a close look at the outside of your home. Check for faded areas, peeling paint, cracks, stains, mildew, chalking, and damaged caulk. These issues can affect how new paint bonds with the surface. A quick inspection can also show whether the home needs a full repaint or only focused repairs.
For example, a home may have sound walls but damaged trim around the windows. In that case, repainting every surface may not be needed right away. However, larger problems need more attention before painting begins. Good exterior painting preparation helps create a cleaner base. It can also reduce problems after the new paint dries.
Build a Color Plan That Makes the Whole Home Work
Choosing one color is only part of the process. Look at the whole exterior before making a final choice. Think about the main walls, trim, shutters, doors, and garage door. Your roof, driveway, plants, and nearby homes can also affect how house exterior paint colors look.
Start with a main color that suits the home’s style. Then choose one or two supporting shades. For example, a soft wall color can work well with darker trim and a stronger front door. Always test samples before buying paint. Look at them in morning light and afternoon shade. This simple step can prevent an expensive color mistake.
Choose Exterior Paint Types Based on Your Home
Different surfaces need different types of exterior house paint. A coating that works well on wood may not suit stucco or masonry. You also need to think about moisture, sunlight, movement, and local weather. These factors can affect how well the coating sticks and how long it keeps its finish.
Acrylic and latex paints are common choices for many homes. Elastomeric coatings can suit some masonry and stucco surfaces. Oil-based coatings still have uses on selected wood and metal areas. Textured coatings can add depth to rough walls. Always check the product label before buying. The surface and weather should guide the final choice.
Acrylic Paint for Flexible Exterior Protection
Acrylic paint can work well on many exterior surfaces. It offers useful flexibility as surfaces expand and contract with weather changes. Many acrylic formulas also provide good resistance to outdoor exposure. This makes them a practical option for many homes. Still, the surface must be clean and sound first. Good preparation helps the coating bond and perform as expected.
Latex Paint for Common Exterior Surfaces
Latex paint is a water-based option used on many residential exterior surfaces. It can be easy to apply and usually dries faster than oil-based paint. Cleanup is also simpler because water can often be used. However, not every latex formula is made for outdoor use. Always choose a product clearly rated for exterior surfaces.
Elastomeric Paint for Masonry and Stucco
Elastomeric coatings are flexible and can suit certain masonry and stucco surfaces. They can help handle small surface movement and offer moisture protection. This makes them useful in some exterior settings. However, they are not right for every wall. The existing surface should be checked first. Product instructions should also guide preparation and application.
Oil-Based Paint for Selected Exterior Areas
Oil-based paint can make sense on certain wood or metal surfaces. It can form a tough finish when used on a suitable exterior area. However, it usually takes longer to dry than water-based paint. Cleanup can also require different products. Because of these differences, check the surface and product instructions before choosing this option.
Textured Coatings for Rough Exterior Surfaces
Textured coatings can add depth to rough or uneven exterior walls. They may also help hide small surface flaws that remain after basic preparation. This can give some homes a more finished appearance. However, texture can make later repairs harder to blend. Before using it, consider both the current look and future maintenance needs.
Compare Paint Choices Before You Commit to One
| Paint Type | Suitable Surfaces | Main Benefit | Important Consideration |
| Acrylic | Many exterior walls | Flexible and weather-resistant | Surface prep still matters |
| Latex | Common exterior surfaces | Easy application and drying | Use an exterior-rated formula. |
| Elastomeric | Stucco and masonry | Flexible moisture protection | Best suited to specific surfaces |
| Oil-Based | Selected wood and metal | Tough protective finish | Longer drying time and different cleanup |
| Textured | Rough walls | Adds texture and hides minor flaws | Future repairs may be harder. |
The table gives you a starting point. Your home’s surface should still guide the choice. A coating made for masonry may not be suitable for wood or metal. Think about moisture, sunlight, movement, and daily weather exposure. These details can affect the need for flexibility and protection.
Also, read the product label before making a final decision. Manufacturers provide specific guidance for surfaces, preparation, drying, and application. That information matters more than choosing a paint type based only on its name. The right exterior house coating should match both your home and the conditions around it.
Turn Popular Exterior Color Ideas Into a Smart Plan
Popular colors can give you ideas, but your home should guide the final choice. Light neutrals can create a clean base. Earthy shades can work well with gardens and natural settings. Blue tones can create a calm look. Strong colors can also add interest when used on smaller features.
Think about balance before adding several colors. A bright door may look great against a neutral wall. Dark trim can define windows and other details. However, using strong shades everywhere can make the exterior feel busy. Try exterior color combinations on different parts of the home. Check them in changing daylight before making a final decision.

Use Light Neutrals for a Clean Exterior Look
White, cream, beige, taupe, and soft grey can create an easy base for many homes. These shades often work well with different roof colors and outdoor settings. They can also make smaller homes feel bright and open. If you want a simple look, start with a soft neutral. Then add contrast through trim or the front door.
Add Contrast Through Trim and Architectural Details
Trim can change the way the entire exterior looks. A darker shade around windows can make them stand out. The same idea can work on shutters, doors, and other details. You do not need a strong color across every wall. A little contrast can give the home more shape without making the design feel too busy.
Try Earthy Tones for a Warm Natural Appearance
Earthy colors can work nicely with trees, lawns, stone, and other natural features. Greens, browns, warm beige, and related shades can create a comfortable exterior. These colors can also suit homes surrounded by mature landscaping. Before choosing one, place a sample near your plants and roof. That will help you see how the shade works in its setting.
Use Blue Shades for a Fresh Exterior Style
Blue and blue-grey shades can give a home a fresh and calm appearance. Lighter blues can feel open and bright. Deeper shades can add more weight to doors or trim. If you like blue, test it beside the roof and other fixed features. Natural light can change blue tones more than you might expect.
Balance Bold Colors With a Neutral Base
Bold colors can add personality without covering the whole home. A strong shade often works best on a front door, shutters, or small trim areas. Pairing it with a neutral wall can keep the exterior balanced. Before painting, step back and view the whole property. The goal is to add interest without creating visual clutter.
Follow the Right Preparation Before Exterior Painting
Good preparation often makes the biggest difference in a paint job. Start by cleaning the exterior and allowing it to dry. Remove loose paint and repair damaged areas. Sand rough spots where needed. Check caulk around windows and other joints. These steps help create a more stable surface for new paint.
Do not rush this stage just because the old surface will soon be covered. Fresh paint cannot fix loose paint, damp walls, or damaged surfaces. It may only hide the problem for a short time. Careful exterior painting preparation gives the new coating a better base. It can also help reduce peeling and uneven results later.
Wash Away Dirt, Mildew, and Loose Paint
Exterior walls collect dirt, dust, mildew, and other buildup over time. These materials can interfere with paint adhesion. Clean the surface before applying new paint and allow it to dry fully. Loose paint should also be removed during this stage. A clean and dry surface gives the new coating a better chance to bond properly.
Remove Peeling Paint Before Applying New Coats
Fresh paint should not cover paint that is already loose. Peeling areas can continue to lift underneath the new coating. Start by removing failing paint from the affected area. Then smooth the edges where needed. This creates a better transition between old and prepared surfaces. It also helps the finished wall look more even.
Repair Cracks, Holes, and Damaged Exterior Areas
Small cracks and holes should be addressed before painting. Damaged areas can leave an uneven finish and may allow moisture to reach deeper surfaces. Check the cause of the damage when possible. Then make suitable repairs before applying paint. If the damage is larger than a simple surface repair, professional help may be needed.
Sand Rough Areas for a More Even Finish
Sanding can help smooth rough spots and hard paint edges. It is useful when old paint creates an uneven transition between surfaces. You do not always need to sand every exterior wall. Focus on areas where the surface needs smoothing or where old coating edges remain visible. Clean away dust before moving to the next step.
Prime Bare or Problem Surfaces Before Painting
Primer can help improve adhesion and coverage on certain surfaces. It may be useful on bare areas, repaired spots, or surfaces that need extra sealing. However, not every exterior surface needs the same primer. Check the paint and primer labels before use. Choosing the right primer can help create a more consistent base.
Know When Weather Is Right for House Painting
Weather can change the way exterior paint dries and cures. Temperature matters, but so do rain, humidity, wind, sunlight, and surface moisture. A day may look perfect while the wall remains too damp for painting. Strong sun can also affect drying. Always check the forecast and the surface before starting work.
Product instructions should guide the acceptable conditions for your chosen paint. Avoid working when conditions fall outside those limits. If rain is expected soon, the project may need to wait. The same applies to extreme heat or cold. Good exterior painting seasons often come down to choosing suitable weather conditions. Waiting for the right conditions can prevent avoidable problems.
Plan the Painting Process From Trim to Final Coat
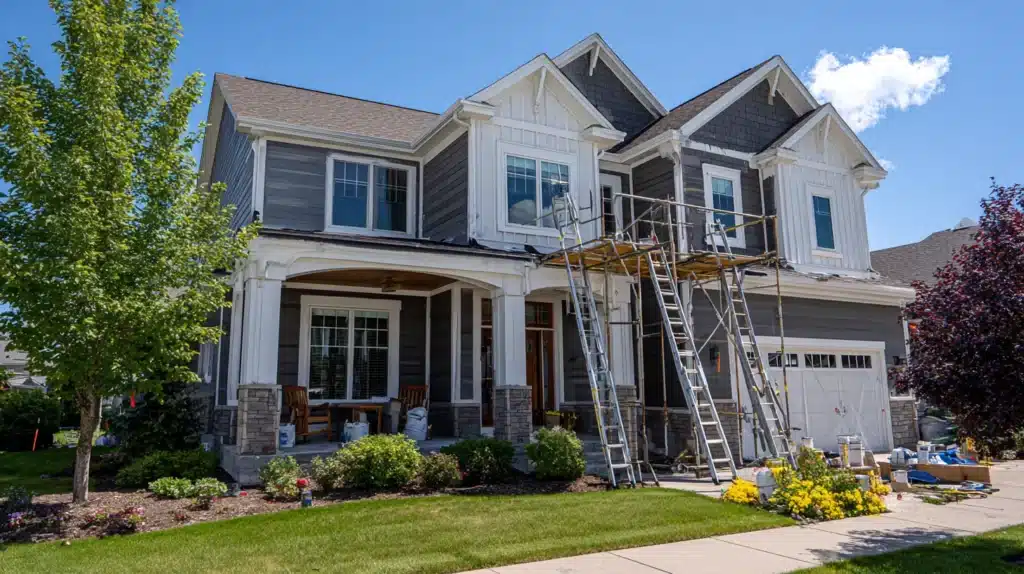
A clear work order can make painting easier and cleaner. Start by protecting windows, plants, doors, and nearby surfaces. Detailed areas such as trim and doors are often handled before large wall sections. Then the main walls can be painted from the top down. This keeps the work more organized and helps control drips.
Do not rush from one coat to the next. Each layer needs enough time to dry based on the product instructions. Once the work is complete, inspect the exterior before removing all protection. Look for runs, missed areas, uneven coverage, or unwanted splatter. A careful final check can catch small issues while they are still easy to fix.
Protect Windows, Doors, Plants, and Nearby Areas
Paint can reach places you never planned to paint. Windows, doors, plants, walkways, and outdoor items all need protection. Cover nearby surfaces and mask areas that need clean edges. Good protection can save time during cleanup. It also helps keep the final result neat. Taking a little extra care before painting can prevent many avoidable marks.
Paint Trim and Doors Before Large Wall Areas
Trim and doors often require more detailed work than broad wall areas. Completing these sections first can help keep the work organized. It also reduces the chance of marking freshly painted walls during detail work. Use the right finish for each surface. Allow these areas to dry as directed before moving through the larger exterior.
Apply Exterior Paint From the Top Down
Working from the top down gives you a simple way to manage drips. Paint can move downward as you work. Starting high lets you deal with those marks before lower areas are finished. Keep your coverage even as you move across the wall. A steady workflow can also make it easier to spot missed areas.
Allow Each Coat to Dry Before Recoating
It can be tempting to add another coat as soon as the surface feels dry. However, paint may need more time to cure before recoating. Follow the product instructions rather than guessing. Rushing can affect the finish and may cause unwanted texture or other problems. Patience here can make a clear difference in the final result.
Check the Finish Before Removing All Protection
Take time to inspect the work before removing every cover and piece of masking. Look for missed spots, runs, uneven coverage, drips, and splatter. Check trim lines and corners too. Small problems are easier to fix while the work area remains protected. A final inspection also helps confirm that the whole exterior looks consistent.
Understand How Many Coats Your Exterior Really Needs
Two coats are common for many painting projects, but they are not a rule for every product or surface. Coverage can depend on the old color, surface condition, paint formula, and application method. A large color change may need more attention than a similar color. The primer may also affect how many topcoats are needed.
The best approach is to follow the product directions. Check the stated coverage and recoat time before buying paint. Buying too little can leave you short during the final stage. Adding extra coats without a reason can also increase cost and labor. A proper plan helps you use enough exterior house painting without wasting material.
Estimate House Painting Cost Before Work Starts
House painting costs can vary widely from one property to another. A small single-story home may need far less work than a large home with several levels. Surface condition also matters. Repairs, access, trim, paint type, and labor can all change the final estimate. That is why one flat price rarely fits every project.
When comparing estimates, look at what each company includes. One quote may include extensive preparation while another may not. Check the scope, number of coats, repairs, materials, protection, and cleanup. A low price is not always the better deal if important work is missing. A detailed estimate gives you a clearer basis for comparison.
Common cost factors include:
- Total exterior surface area
- Number of stories
- Existing paint condition
- Cleaning and preparation needs
- Crack and surface repairs
- Primer requirements
- Number of paint coats
- Paint quality and coating type
- Trim and detail work
- Access and equipment needs
- Labor rates
- Cleanup and property protection
Know How Long Exterior Paint Can Last on Your Home
Exterior house painting does not have one fixed lifespan. Climate, sunlight, moisture, surface type, paint quality, and preparation can all affect its life. A home with strong sun exposure may need attention sooner than a shaded property. Good maintenance can also help a coating stay presentable for longer.
Some homes may need repainting around seven to ten years after the previous project. However, this is only a general guide. Look for fading, cracking, peeling, chalking, or exposed surfaces. These signs can tell you more than a calendar date. Following paint life extension practices can help keep exterior surfaces in better condition between repainting projects.
Keep Your Freshly Painted Exterior Looking Its Best
A fresh paint job still needs basic care. Check the exterior from time to time for peeling, cracks, stains, mildew, and damaged caulk. Gentle cleaning can remove dirt before it becomes harder to manage. Small touch-ups can also stop minor paint failures from spreading across larger areas.
Moisture deserves special attention. Check places where water may collect or reach the wall. Keep gutters working and address leaks when they appear. Good residential painting care is part of wider home maintenance. Small tasks may seem minor, but they can help your exterior stay clean and presentable between larger painting projects.
Avoid Common Mistakes That Shorten Paint Life
Even good paint can fail early when basic steps are skipped. Many problems start before the first coat goes on. Others happen because homeowners rush the work or ignore small defects. Knowing these common mistakes can help you avoid extra repairs and an early repaint.
Common mistakes include:
- Painting over peeling or loose paint: New paint may peel with the old layer.
- Ignoring cracks and damaged surfaces: Small problems can become harder to repair.
- Painting over damp walls: Moisture can affect adhesion and finish quality.
- Choosing interior paint for outdoor surfaces: Interior formulas are not made for exterior exposure.
- Skipping primer when the surface needs it: Some surfaces need primer for better adhesion.
- Painting during unsuitable weather: Poor conditions can affect drying and curing.
- Applying another coat too soon: Rushing can affect the final finish.
- Choosing colors without testing samples: Light can change how colors appear.
- Using the wrong finish for trim or doors: Different surfaces may need different finishes.
- Ignoring small paint failures after completion: Early repairs can prevent larger problems.
Final Thoughts
Exterior house painting can change more than the color of your home. A well-planned project can improve curb appeal while helping protect exposed surfaces. Start by checking the exterior and fixing problems first. Then choose colors and paint that suit the home. Weather and proper application also matter when you want a lasting finish. Evers Painting can help with professional exterior painting and proper preparation.
Take time to plan before buying paint or booking work. Compare the full project scope and consider future care. Good preparation can make the final result look cleaner and last longer. If you are ready to begin, assess your home’s needs first. Then create a clear color plan and request a detailed estimate.
FAQs
Homeowners often have questions about paint life, cost, colors, preparation, weather, and timing.
These choices can affect curb appeal and the lasting quality of the finish.
Here are some quick points to consider before starting your painting project.
Many homes may need repainting around seven to ten years. Climate, paint quality, surface condition, and maintenance can change that timeline.
No single paint type lasts longest on every home. The right choice depends on the surface, climate, preparation, product, and application.
Repair peeling paint, cracks, damaged areas, loose caulk, and moisture problems. A clean and sound surface gives new paint a better base.
Light neutrals, earthy tones, blue shades, and balanced contrast can improve curb appeal. Test samples first because daylight can change their appearance.
Costs depend on home size, stories, repairs, preparation, paint type, access, and labor. Compare detailed estimates instead of relying on one flat price.