
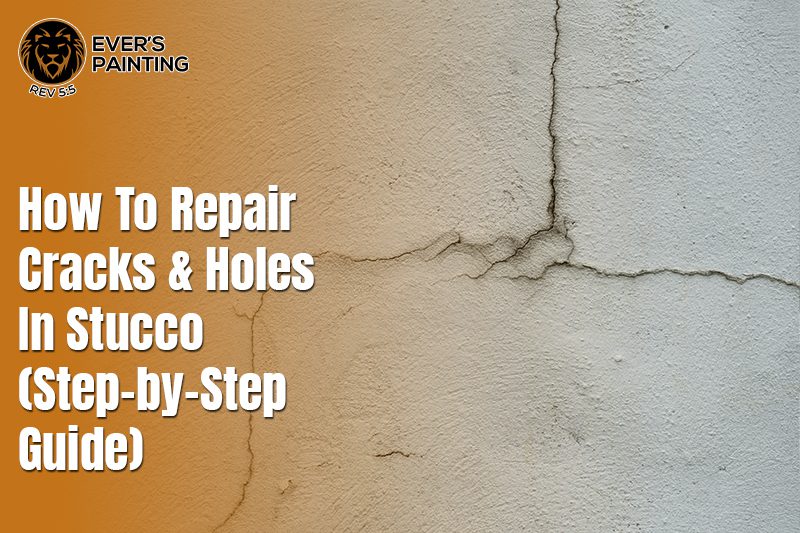
Why do stucco cracks and holes appear commonly? Stucco walls are strong, yet over time, they can show cracks or pits. These flaws often form because of stress from severe weather conditions or soil shift.
Hairline cracks can spread with rain or wind, while holes may come from loose mesh or past work. Even minor flaws can lead to water seep, which harms the base coat. Left alone, these gaps may grow, cause damp, and spoil the wall’s look.
For both looks and form, it is vital to act fast. Quick care keeps walls neat and also helps the main frame stay firm. Acting early saves costs later and helps walls stay firm for years.
In this guide, you will learn how to repair stucco with clear tips. We will show a step plan, list the right gear, and guide you in each step. We will also cover stucco crack repair for small flaws and show how to treat big pits.
By the end, you will know tools to use, coats to apply, and how to blend with old work. This plan is made for home DIY users who want to fix walls and cut costs. Follow close and your stucco will look firm and new again.
Tools & Materials Needed
Tools:
For work to last, the right tools and base items are key. You will need simple hand tools that help clear loose bits and spread new coats. Start with a hammer and cold chisel, which are used to knock out loose stucco near cracks or holes. Then take a wire brush, which helps scrub the wall face clean.
For spread work, keep a notched trowel or scratch tool to mark lines, and a rubber float or knife to press new coats in place. To blend the wall skin, a stiff brush or sponge is also vital. Last, a spray bottle is handy to mist the wall and keep it damp while the coats cure.
Materials:
Next are items for patchwork. For a mix, you can buy a pre-mix stucco patching guide kit, or blend cement, lime, and sand on your own. An acrylic bond agent helps new coats grip old work. For large pits, use grade-D paper and metal mesh, held by roof nails.
You may need a primer coat and paint for a neat end. This stucco repair step-by-step plan works best when you have all the gear set out first. A neat start makes each stage smooth and cuts the chance of flaws or weak spots.
Step-by-Step Process to Repair Stucco Cracks and Holes
Step 1: Prepare the Area
Start by wearing gloves and eye gear to stay safe. Use a hammer with a cold chisel to chip off loose bits around the crack or hole. The aim is to make the flaw clean and firm. Then scrub the face with a wire brush to take out dust, dirt, or old coat chips.
Once clear, rinse or wipe the wall. Now add a bond agent to the patch spot. This helps new stucco bind with old coats and stops split lines. Prep is the most key part, since poor prep leads to weak work.
Whether you need to fix holes in stucco or do stucco crack repair, this first step must be done with care. Good prep makes all next coats last and look smooth.
Step 2: Cover Lath (For Large Repairs)
If you work on a big hole and see mesh, you must fix it first. Start with grade-D paper, cut and set it so that it covers the gap, then nail it firm.
Next, take a metal mesh and place it over the patch site. Be sure it laps the old mesh to keep one frame. Drive roof nails through to hold it tight, so that it does not shift.
A neat frame keeps coats flat and firm. This step is not for small flaws but is key to big pits. In such jobs, you must repair stucco siding with both mesh and a paper base.
Follow this stucco patching guide so that new coats sit well, dry firm, and last long. This base frame stops new flaws and makes the wall look neat once the coats are done.
Step 3: Mix the Stucco
Once the wall base is set, you must blend the stucco. If you buy a pre-mix pack, pour it into a clean tray. If you use raw sand, lime, and cement, mix them at a set rate. Add water slow, not all at once, and blend to a smooth paste.
A bond agent may be mixed in to add grip and life. The paste should look like nut butter, not too dry or thin. A good mix is key since weak or too wet paste may crack or fall. Mix with care until the coat has a firm yet soft flow. At this point, you can move to the coat steps. This stucco repair step-by-step mix stage will help your patch last for years.
Step 4: Apply the Scratch Coat
This is the first thin layer, and it gives a base and grip. Use a trowel to press a thin coat, about a fourth inch thick, into the mesh or edges. Push it hard so it bonds with the wall. Take a notch tool and score lines flat across the coat. These lines help the next coat hold firm.
Cover the patch with a thin wrap so it stays damp. Mist it each day for one or two days to cure. The coat must not dry too quick or it may crack. This stage shows how key prep and cure are in repairing stucco. With this done, you are past the first step of stucco crack repair and ready for more coats.
Step 5: Apply the Brown Coat
After the scratch coat cures, spread the brown coat. This coat gives bulk and keeps the patch in line with the wall. Mix the new paste, then press a layer of half-inch depth with a trowel. Spread it smooth and even, so no bumps or dips form.
The aim is to make the wall flat. Keep the patch damp with mist each day for a week. This slow cure helps the coat bond and stay firm. At this stage of stucco repair step by step, the wall has gained core strength.
Both stucco crack repair and repair stucco siding rely on this base coat. Do not rush the cure, or flaws may form.
Step 6: Apply the Finish Coat & Match Texture
When the brown coat is dry, apply the last coat. Mix the paste at the same rate as before. Spread a thin layer of one-fourth inch depth. Use a trowel or sponge to match the look of the old wall. Work slow to copy the skin so the patch blends.
Some walls are smooth, some have rough skins. Take time to copy the right style. Mist the coat each day for three days to cure. Once dry, you can prime and paint to match. This step shows how to fix holes in stucco so they blend well. A neat end hides flaws and gives back full curb charm.
Step 7: Cure, Prime & Paint
Mist the patched spot each day until it fully cures. This may take several days or even a week, based on the sun and wind. Once the surface is firm, brush off dust and prep for primer. Apply a thin coat of masonry primer to improve the bond.
Finish with two thin coats of exterior acrylic paint after drying. Allow each coat to dry fully before adding the next layer. A tinted mix can help with shade match, but paint the whole wall if the tones vary. Careful cure and neat paint work give a clean look and strong hold, completing your effort to repair stucco siding.
Quick Fixes: Caulking and Patch Kits
Small gaps in stucco may look minor, but they can spread fast with time. One simple way to handle these flaws is with strong caulk made for walls. Products like elastomeric or polyurethane caulk are built to hold firm.
Brands such as Quikrete or DAP are known to work well for this task. These caulks close hairline gaps and stop water from getting inside. Using caulk is part of good stucco crack repair, and it helps stop further harm.
The main step is to clean the line, press the caulk inside, and smooth it out with care. Once dry, the gap is sealed, and the wall has less risk of damp.
For small pits, chips, or gaps, you can try stucco patch kits. These are made for home use and give fast fixes for thin-wall flaws. Brands like Behr or Quikrete make mixes that you can apply by hand or tool.
You press the patch mix in the gap, then shape it to match the old wall look. This way, the blend is close, and the fix is less clear. Many DIY users find patch kits handy when they need to fix holes in stucco without full wall work.
These quick steps save time, but they are best for light flaws, not large wall breaks. Quick fixes are easier than full-wall jobs, yet they have limits. They do not hold as long as full coat work, so use them for small spots only.
Pro Tips for a Professional Finish
When you deal with thin lines on the wall, elastomeric caulk is the best pick. It is fast to use, and it moves with the wall as temps shift. This makes it a strong choice in a stucco repair step-by-step plan, as it keeps gaps from growing.
You just clean the gap, add the caulk with care, and smooth it with a tool. The bond is neat, and the gap stays shut for a long time.
Many pros use a fog coat instead of paint when they need to blend wall tones. A fog coat is a thin mix that adds shade without hiding the look of the wall. It blends new work with old work, so the fix is less clear. This makes it a smart way to fix holes in stucco or blend spots after patch jobs.
Always apply the mix in thin coats, since thick coats can split and break as they dry. Thin layers give a firm hold and last much longer. Before you apply the final coat, test your blend on a small board or card.
This step lets you match the style and tone before you touch the real wall. It is a small act, but it helps make the end work neat and professional.
For similar precision techniques on wood, explore pro guides on how to paint furniture for flawless results and smooth finishes
Common Mistakes to Avoid
Some errors are seen time and time again in stucco repair step-by-step jobs. One is poor prep, where dust or an old coat is left. This leads to a weak bond. Another is mixing too wet, which makes cracks as it dries. Not curing is also a big flaw, since coats dry too fast. Wrong skin is a style flaw, which makes the patch clear.
For DIY work, a big flaw is to skip the mesh in wide holes. This leaves coats weak and prone to sag. To avoid these, take time with each stage of how to repair stucco. Good care saves both time and cost in the long run.
Cost Considerations & When to Hire a Professional
DIY Costs:
When planning stucco wall repair, it is important to weigh both cost and scope. A do-it-yourself path can seem more budget-friendly at first. Basic tools such as hawks, floats, and mixing gear can add up to about $125–$175.
Materials usually cost around $10–$15 per square foot. For small cracks and patches, this route often keeps stucco repair cost low while still delivering neat results.
Pro Costs:
Hiring a professional is a larger step, but often needed for major jobs. Pro services range from $40–$120 per square foot. If scaffolding is required, expect an extra $200–$500, depending on wall height and site layout.
When to Hire Pros:
While this raises the total stucco repair cost, it also ensures expertise and speed. It also reduced the risk of errors. Choosing a skilled contractor for stucco wall repair becomes practical when large wall areas are damaged.
It also helps better when water has seeped inside, or when a full re-stucco proves more economical than spot work. For many homeowners, the value of lasting quality justifies the higher price.
Preventing Future Stucco Damage
The best fix is to stop flaws from first form. Keep walls dry by sealing roof leaks and keeping drains clear. Check the soil near the walls, since poor grade may cause a water pool. Keep shrubs trimmed so air can move.
Paint coats help seal the face, though they must still let steam out. Watch for hairline flaws each year and seal them quick. With care, you may not need big jobs. In this guide on how to repair stucco, the stop steps are as key as the fix steps. They help walls last long and keep the home neat.
Our Professional Services
At Ever’s Painting, we bring proven skills in both interior and exterior projects, including fine work on kitchen cabinets. Our team also provides expert stucco wall repair and full painting services to rejuvenate your property. Every job is handled carefully, using the right materials and a clear process to ensure durable results. If you need to restore walls, we are here to guide you from start to finish. Contact us today for a free consultation and estimate to see how our services can add fresh value to your space.
Conclusion
Stucco is both tough and neat, but it needs care. Over time, cracks may form, but they can be fixed with the right plan. From prep to cure, each step must be done with care. With the right tools and mix, you can repair stucco siding at home. Quick seal for small flaws, and coat work for big holes.
Blend skin and shade for a neat look. Take care, slow, and flaws will not come back. Use this stucco patching guide, and the wall will look firm once more. This is the full map on how to repair stucco, and with care, your home will stay neat and sound.
FAQs
You can fix small flaws with patch kits. Large flaws need mesh and coats.
No, wet walls stop bond and cause flaws. Always work on dry days.
With the right mix and cure, a patch may last for years.
Yes, paint helps match the shade and adds a seal to the wall face.
Yes, it shows the steps clear so you do not miss key work.