

Painting plain pots can turn simple planters into beautiful home pieces. Many people enjoy this DIY project because it adds color and style to indoor and outdoor spaces. With the right tools and steps, you can create lasting designs. This guide shares simple home decor pot painting techniques to help beginners try new ideas with confidence.
Transform Everyday Pots With Better Techniques
Plain pots can become nice decor pieces with simple paint ideas. Many people enjoy this project at home. But they often face issues like rough paint layers or faded colors. Learning the right home decor pot painting techniques can help create clean and lasting results. Now let’s see some easy ways to improve your pot designs.
Clean And Prepare The Pot Surface
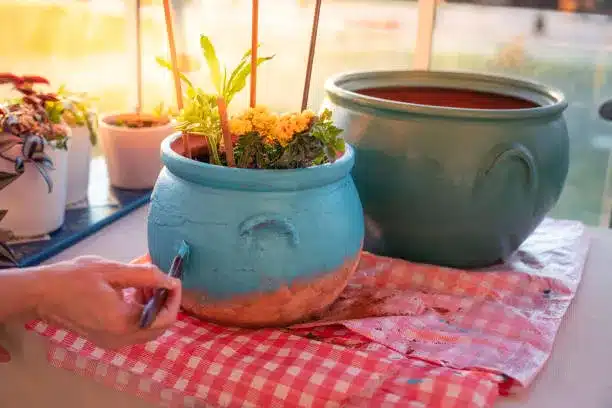
A clean pot gives paint a better grip. Wash the pot and remove all dirt. Let it dry before adding any paint. This step helps avoid rough spots and cracks. Good pot painting methods start with proper care before any design work begins, much like kitchen cabinet refinishing, where surface preparation plays a key role in achieving a smooth and lasting finish.
Apply a base coat first.
A base coat helps create an even paint layer. It also helps bright colors stand out more. Use a thin coat and wait until it dries. You might notice better results when the pot has a smooth base before adding more designs.
Use simple brush painting.
Brush painting gives you more control over your design. Use small brushes for details and large brushes for wide areas. Start with basic lines and shapes. These brush painting tips help beginners create neat patterns without making the pot look messy.
Try Sponge Paint Effects
A sponge can add soft texture to your pot. Dab the paint gently to create light marks. This method is simple and fun for beginners. Sponge painting ideas can help you make unique designs without needing advanced painting skills.
Add Easy Decorative Patterns
Simple patterns can make plain pots look fresh. Try dots, lines, leaves, or shapes. Begin with small ideas before making larger designs. These decorative painting styles allow you to create personal designs that match your home space.
Protect The Paint Finish
A good seal helps protect your painted pot. It keeps the colors fresh and reduces damage from water. Apply the sealer after the paint dries fully. Choosing products such as sun safe paint for outdoor projects can also help reduce fading caused by prolonged sunlight. This final step helps your design last longer and supports better DIY painting skills.A good seal helps protect your painted pot. It keeps the colors fresh and reduces damage from water. Apply the sealer after the paint dries fully. This final step helps your design last longer and supports better DIY painting skills.
Choosing Paint Finishes For Different Styles
The paint finish can change how a pot looks and feels. Some finishes give a soft look. Others add more shine and color depth. Now let’s see how each finish works for different needs. The right choice of Home Decor Pot Painting Techniques can help create better modern paint techniques for your home decor.
Matte Finish For A Calm Style
A matte finish gives pots a soft and simple look. It works well with natural themes and quiet spaces. This finish does not reflect much light. It can hide small marks and create a smooth style for many decorative painting styles.
Satin Finish For A Clean Look
A satin finish adds a gentle shine to painted pots. It gives a fresh look without being too bright. This finish works well in many home areas. You might notice that satin pots are easier to clean and keep looking neat.
Glossy Finish For A Bright Effect
A glossy finish creates a bold and shiny surface. It helps colors look stronger and more clear. This style suits modern rooms with bright decor. Many people use glossy paint for stylish flower pot painting when they want a fresh visual touch.
Mixing Finishes For Unique Designs
You can mix paint finishes to create new looks. Use matte colors with glossy details for contrast. Small changes can make a pot feel more special. This method lets you try new ideas while keeping your design simple and easy to manage.
Brush Selection Changes Every Painting Result
Choosing the right brush can change the final look of your pot. A small brush works well for fine lines and small details. A wider brush helps cover large areas faster. Many beginners get uneven results because they use one brush for every task. Good brush painting tips help create smoother and cleaner designs.
For example, a person painting a flowerpot may use a thin brush for leaf shapes and a flat brush for the base color. This simple change can reduce brush marks and improve control. Using soft brushes also helps create better creative brush painting techniques and clear artistic paint patterns without extra effort.
Creative Texture Effects Using Simple Tools
Simple tools can help create unique looks on plain pots. You do not need costly items for good results. Small changes in paint layers can add more style and detail. Now let’s see how sponges work, and paint layers can create fresh designs with easy steps.
Sponge Dabbing For Soft Texture
A sponge can create soft marks and gentle patterns on pots. For example, a person painting a bedroom planter can use a sponge to add light shades over a base coat. This creates a smooth effect without hard lines. These sponge painting ideas are simple for beginners.
Layering Paint For Depth
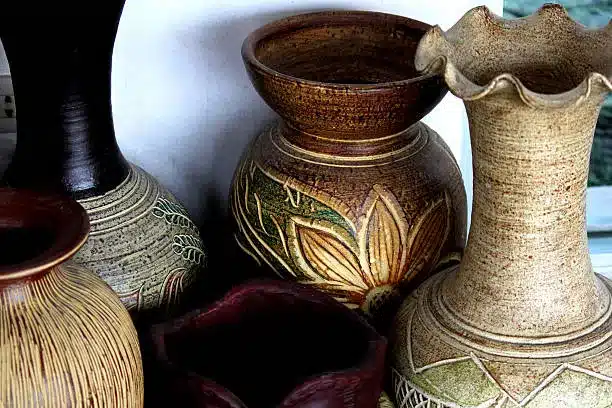
Layering paint adds more detail and makes designs look richer. A person creating a garden pot can add a dark base, then place lighter shades on top. Each layer creates more depth and style. These DIY sponge painting ideas and decorative painting styles help build creative finishes.
Professional Workflow For Flawless Pot Painting
A good painting process helps create pots that look neat and last longer. Many people rush steps and face problems like uneven color or weak paint. A clear workflow makes the task easier. This home planter painting guide shares simple steps to improve results and avoid common mistakes.
Apply a suitable primer
Primer helps paint stick better to the pot surface. It creates a smooth base before adding colors. A person painting outdoor clay pots may notice that primer reduces peeling after rain. Using the right base layer supports better results with acrylic painting techniques.
Build Thin Paint Layers
Thin paint layers give a cleaner finish than thick coats. Each layer needs time to dry before adding more color. A homeowner painting pots for a balcony garden can avoid cracks by using light coats. This simple method also helps prevent issues similar to cracked exterior paint, where heavy layers and poor preparation often reduce durability. These professional pot painting tips help create a smooth surface.
Blend Decorative Colors
Blending colors can make simple pots look more attractive. Soft color changes work well for natural themes. Someone creating pots for a living room shelf may mix two shades to match the space. Smooth blending helps achieve a balanced look with creative planter painting methods.
Add Artistic Patterns
Small patterns can add personality to plain pots. Use simple shapes like dots, leaves, or lines. A garden lover may add leaf patterns to match nearby plants. These artistic planter painting methods allow people to create custom designs without complex skills.
Seal The Finished Surface
A protective seal keeps the paint safe from damage. It helps reduce fading and protects the design from moisture. A person placing painted pots near a window can use a clear seal to keep colors fresh. This step supports a long-lasting decorative finish.
Cure Before Displaying
Paint needs enough time to fully set before use. Moving the pot too soon can damage the design. A homeowner who paints pots for a patio should wait before adding soil or plants. Proper curing helps the final finish stay clean and strong.
Pattern Ideas That Match Modern Interiors
Modern homes often use simple patterns to add style without making spaces look crowded. Painted pots can match room themes with the right shapes and colors, making them a great complement to interior painting projects that refresh living spaces. These ideas help create personal designs that feel fresh and balanced. Now explore some artistic paint patterns that work well with different decor styles.Modern homes often use simple patterns to add style without making spaces look crowded. Painted pots can match room themes with the right shapes and colors. These ideas help create personal designs that feel fresh and balanced. Now explore some artistic paint patterns that work well with different decor styles.
Popular Pattern Ideas For Painted Pots
- Geometric Shapes
Use lines, circles, and squares for a clean, modern look. These patterns work well with simple rooms and neutral decor. - Leaf And Plant Designs
Add leaves, flowers, or small plant shapes for a natural feel. These designs suit indoor spaces with green plants. - Abstract Color Marks
Try free shapes and soft color areas for a creative look. This style allows more freedom with modern paint techniques. - Minimal Line Patterns
Simple lines can create a neat and stylish finish. These designs are easy for beginners and fit many home styles. - Dot And Circle Patterns
Small dots can create playful or elegant designs. Use different sizes to add more detail to the pot. - Two-Tone Designs
Combine two matching colors for a smooth and modern effect. This approach supports simple pot design techniques with less effort. - Textured Pattern Effects
Add texture with sponge marks or brush strokes. These effects create depth while keeping the design easy to make.
Acrylic Methods That Deliver Smooth Coverage
Acrylic paint is a popular choice for pot painting because it dries fast and offers many color options. Good paint control helps create smooth results. Using the right methods can prevent rough areas and uneven coats. These acrylic painting techniques help beginners create cleaner finishes with simple steps.
Mixing Paint Consistency Correctly
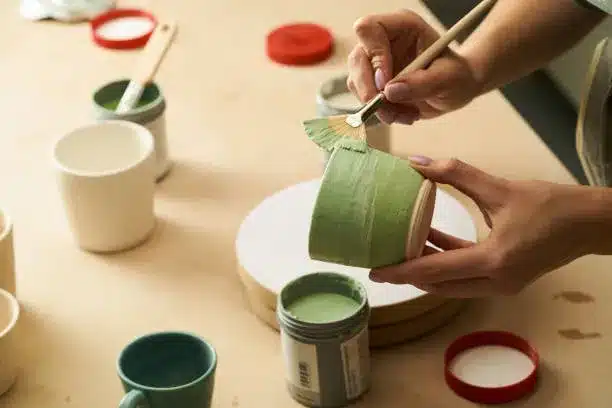
The right paint thickness helps colors spread better on pots. Thick paint may leave marks, while thin paint may look weak. A person painting a clay pot for a window area can mix small amounts of water to improve flow. These beginner acrylic painting methods create smoother coverage.
Applying Even Color Layers
Even layers help build a strong and neat finish. Apply light coats and allow each layer to dry before adding more paint. Someone decorating pots for a balcony can avoid patchy areas by using this method. These easy pot painting techniques support better color control and lasting results.
Lasting Protection Starts With Proper Sealing
A good seal helps protect painted pots from damage. It keeps colors fresh and reduces wear from water or sunlight. The right choice depends on where the pot will stay. Indoor and outdoor planters need different care. These steps support better results with a decorative planter painting guide.
Choose The Right Sealer For Each Pot
Indoor pots often need a light seal for dust and small marks. Outdoor pots need stronger protection from weather changes. A homeowner placing painted pots on a patio may use a weather-safe coat to protect the design. The same attention to durability is important in exterior painting, where surfaces must withstand changing weather conditions. This supports long-lasting ceramic painting methods.
Apply the sealer with care.
A smooth sealer layer helps maintain the final look. Too much product can create a cloudy surface. Someone painting ceramic pots for a garden area can apply thin coats and allow proper drying time. These modern ceramic painting techniques help keep colors bright and designs clean.
Simple Mistakes That Ruin Decorative Finishes
Small mistakes can affect the final look of painted pots. Many DIY projects fail because of poor prep or rushed steps. Knowing common issues helps save time and paint. These tips can improve results and support better pot painting methods for clean and lasting finishes.
Skipping Surface Cleaning
Dust and dirt can stop paint from sticking well. A person painting an old garden pot may see peeling after a few days if the surface is not cleaned. Washing and drying the pot first helps create a stronger base for better results.
Using Thick Paint Layers
Heavy paint coats often dry unevenly and leave marks. Beginners may add more paint to cover spots quickly. A better method is to use thin layers and allow drying time. These DIY painting skills help create a smooth and neat surface.
Ignoring Drying Time
Rushing between paint steps can damage the design. Touching wet layers may cause smears or mixed colors. Someone decorating pots for a shelf should wait before adding details. Good timing is one of the key professional pot painting tips for better finishes.
Choosing The Wrong Finish
The wrong seal or paint type can reduce durability. Outdoor pots need more protection than indoor pieces. A homeowner placing pots near rain or sunlight should pick products based on use. This helps keep the design fresh for a longer time.
Final Thoughts Before Starting Your Next Project
Painting pots can be a simple way to add a fresh look to your space. Good planning helps you avoid common issues and get better results. Choose the right tools, prepare the surface, and follow each step with care. These home decor pot painting techniques, inspired by Evers Painting, can help you create designs that match your style and needs.
Take your time with colors, patterns, and finishes. Small details can make a big change in the final look. Whether you prefer simple shapes or creative designs, the right approach makes the process easier. Explore different decorative painting styles and start your next project with confidence. For expert help with custom-painted pieces, contact a trusted local service today.
Extra Questions Every DIY Painter Should Know
Many DIY decorators have extra questions before starting a pot-painting project. These answers cover common concerns about paint choices, finishing steps, and simple methods. The following FAQs share useful tips for better results. They also explain small details that can help beginners avoid mistakes during their creative work.
Yes, textured paints can work well on terracotta planters. They add depth and create unique surface effects. Clean the pot first and use a suitable base coat. This helps the texture stay in place and gives better results.
Most pots need two to three thin paint coats. Each layer should dry before adding another coat. Thin layers often look smoother than one thick layer. This simple method helps create a cleaner finish.
Both options work for different needs. Spray paint covers large areas quickly. Acrylic brush painting gives more control for small details and patterns. Beginners often prefer brush work because it helps improve brush painting tips and accuracy.
Bubbles usually appear because of trapped air or moisture. Applying paint on a wet or dirty surface can cause this issue. Allow the pot to dry fully before painting. Proper prep helps prevent these problems.
Yes, old paint can often stay if it is clean and stable. Light sanding can help the new layer stick better. Remove loose paint before starting. This saves time and supports better results with simple sponge painting ideas.